When I first started selling photo greeting cards, prints, and magnets on Etsy, I struggled with product photography.
Even though I knew things about photography, taking product photos was an entirely new world to me.
I tried to improve my photos (or so I thought), but they always seemed to look amateurish.
The uneven lighting, awkward angles, and so-so composition never resulted in me capturing those beautiful click-worthy product photos I envied from other Etsy sellers.
I made some sales, but they paled in comparison to what I was hoping to make.
Take Great Product Photos With Your Phone
Capture quality product photos with these 3 EASY smartphone camera hacks and sell more of your crafts online.
It wasn’t until years later that I realize all the mistakes I had made when trying to photograph my products.
So what have I learned since then? A lot. Now, I can get those beautiful, crisp product photos I’d always wanted quickly and easily.
That’s why I want to share with you the 5 things I wish I had learned about product photography as an Etsy seller and what I’d do differently if I had to do it all over again.
1. Standard home lighting sucks for product photography
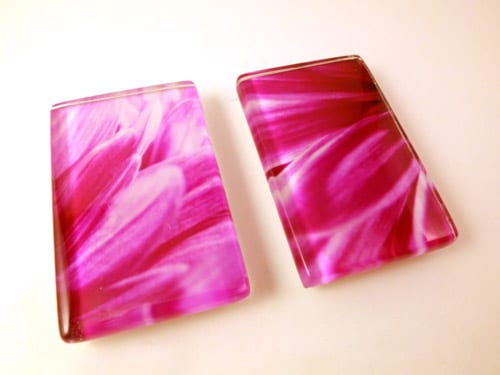
A product photo from my Etsy selling days
Do you know those overhead lights in your bedroom and bathroom? Newsflash: They're not the best light source for photographing products.
Why? Because first, your light source is too far away and second, you can’t control the direction or distance. Plus, it can also throw off the colors of your products in your photos.
When I took my photos for Etsy, I used a low-wattage light in my living room. The lighting was perfect for watching TV or reading a book at night, but omg it was horrible for photographing products to sell online. I don’t know what I was thinking.
I ended up with photos that had weird shadows, odd color casting, and that looked fuzzy and grainy.
At this time, I was using an actual camera, not a smartphone to take photos so there was no reason my photos shouldn’t be coming out top-notch.
I think at one point I tried a side table lamp and while it helped make my photos brighter, the uneven lighting was still a problem.
It wasn’t until later that I realized I already had perfect lighting at home. In fact, it was staring at me in the face every single day, but more on this later …
2. Have you REALLY tried everything?
At the time, I thought I tried everything to improve my photos, but in reality, I hadn’t.
You often want to see results instantly and when you don’t, you throw up your hands and say, “Oh well, I guess this is it. I don’t know how to do this and this is as good as my photos are going to get.”
That was my train of thought when it came to my product photos.
As a result, I settled for mediocre product photos that I wasn’t happy with.
Then one day I got together with two fellow makers from the local Etsy community for a collaborative work session at one of their apartments.
My maker friend whose apartment we were at suggested that I photograph my products next to this window she liked to take her product photos in.
So I set my product up, took a few photos, saw my photos, and said, “Omg, these photos look so much better than the ones I take at home!” I couldn’t believe it.
I wanted to take all my product photos there, but due to time constraints and how many products I had it wasn’t going to work.
Plus, was I only going to take product photos at her apartment moving forward? It wasn’t realistic.
One of the photos I took at an Etsy seller's house
After that day, it didn’t dawn on me that I should try to replicate that lighting at my apartment. Instead, I stuck with my crappy overhead house lighting to take product photos, which was unfortunate.
It wasn’t until later that I found out the lighting from my north-facing windows was perfect for product photos.
All I needed to do was to practice and experiment with the lighting to create beautiful product photos right there in my own home.
3. Using these (inexpensive) tools will make photographing products easier
When I took product photos the first time around, I just used 2 pieces of white mat board as my background for my product and my camera. Nothing else.
Well, I did use a lightbox a few times (more on that in a bit), but overall, I didn’t use anything else to take product photos.
It never crossed my mind that using other things would have not only made taking product photos better but also made it easier for me.
I was always holding my camera in one hand and having to make adjustments with my other hand. It was annoying. But if had used a tripod, I would have been able to stabilize my camera and frame my products easily.
I could have also used white foam core boards to improve my lighting. They would have helped me control the direction of light and soften the shadows to achieve the bright product photos I desired.
If only I knew!
4. The more things you’re able to control, the better
One of the most popular photography tools makers gravitate towards using to photograph their handmade products are light boxes, or light tents.
They’re these boxes that are covered on all sides with white semi-transparent material and one side is open for you to put your product in and photograph.
They often come with lights or you can DIY your box and supply your own lights.
At the time, I didn’t really know what I was doing and it seemed like the product to use, so I thought, what the heck, let me try.
I DIY'd a lightbox via an online tutorial because I didn’t want to spend the money to buy one online. And I’m glad I DIY’d my box and saved my money because the photos didn’t come out very well.
I wasn’t sure why though because so many other Etsy sellers were using them and talking about how great they were.
So when I decided to try product photography again, I again made my lightbox with an old shipping box and a white trash bag for fun. I used some grow lights as my light source and took some test shots. I quickly realized again, that I hated the box.

My DIY lightbox, the 2nd attempt
However, this time around I knew why I didn’t like them.
First off, I was getting too much light and I was getting glare on my photo greeting cards. It was also eliminating all the shadows which made for a flat product photo.
Shadows are good because they give depth to a product (it’s a 3D object after all) and removing them makes a product look one-dimensional.
The other problem I was having was I couldn’t shoot my product from different angles. I was confined to one side of the box which was annoying.
I soon realized that using seamless paper with some foam core boards next to a sunny window produced much better product photos.
The lighting was better and I could position my camera (and product) in different directions and play with shadows.
That’s why I’ve discovered that the more control I have over my setup to photograph products, the better my photos look.

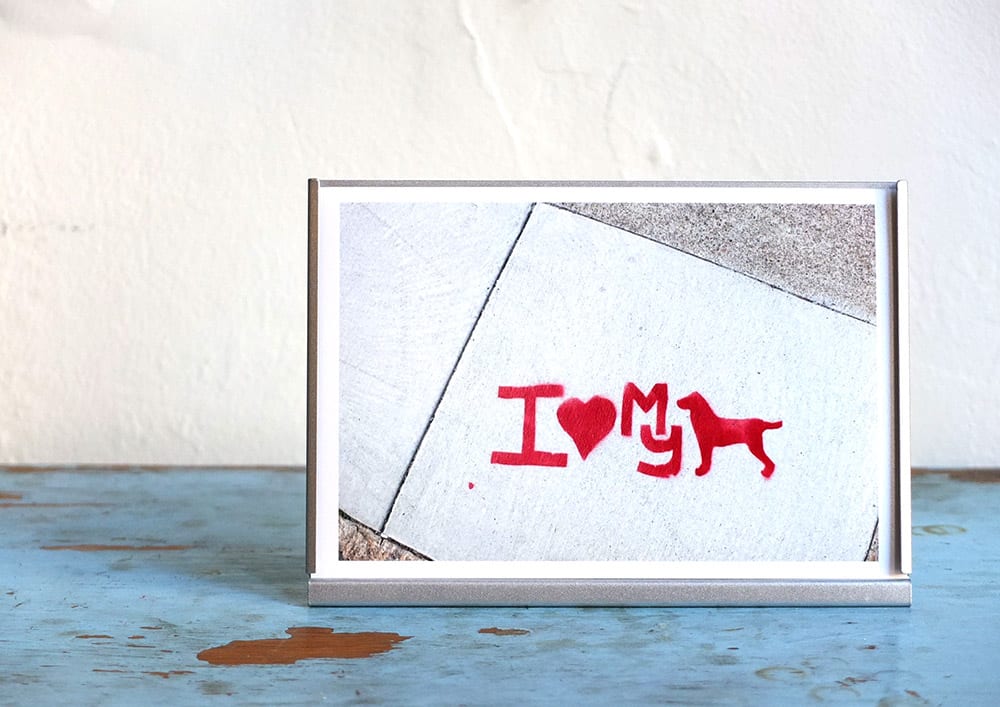
My product photos now, without a lightbox
5. Get inspired by your competitors
When you’re just starting out selling your handmade products online, chances are you might not know how to photograph your products. Or maybe you have product photos, but you’re not sure how to make them look better.
One of the things I wish I had done to create better product photos when I was selling on Etsy was to look at competitors for photo inspiration.
By looking at product photos from businesses that sell similar products, I could have found a bunch of ideas for how I could better photograph my products.
Getting inspiration from other makers could have inspired me to keep working to improve my photos instead of giving up and settling for mediocre product photos.
How do you photograph products for Etsy?
Now you might be wondering, “Then how do I take photos for Etsy? How do I make my products look professional, and that get me clicks and sales?”
If I had to do it all over again, I would approach taking product photos differently.
Here are my top Etsy product photography tips every maker should do to get click-worthy product photos of their handmade products.

1. Nail your lighting down
Lighting is hands down the area that will make the biggest difference in how your product photos look.
It’s also the source of a lot of unwanted problems you might deal with such has unflattering shadows, glare issues, color casting, dark photos and so on.
By learning how light works and how to manipulate it, you can dramatically change the way your products look and feel. It can transform your product from looking cheap and basic to high quality and luxurious.
Etsy customers want to know they're buying quality products so improving your lighting alone can impact how customers perceive your work..
Whether you using natural light or studio lighting to photograph your work, you can 100% create stunning photos of your handmade products.
Spend time playing around with your lighting to better understand how the light interacts with your specific products. Experiment with angles, what direction makes your photos look better or worse, etc.
And don’t be afraid to use these tools to help you create beautiful, soft lighting that will show off your products in the best light.
2. Get out of auto mode and into manual mode
So many Etsy sellers shoot in auto mode. Now, auto mode is fine if you’re taking a quick snapshot of your friends or your favorite vacation spot, but it’s not ideal for product photography.
In auto mode, your camera is doing all the guesswork in what it thinks will result in a good photo. But oftentimes it gets it wrong. This is why you often end up with inconsistent-looking product photos.
The color may look off in one photo and the next your photo’s too dark. Shooting in auto can be frankly really frustrating.
But if you shoot in manual mode and understand how what settings are ideal to photograph your work, you’ll be able to create quality photos more consistently. You’ll also reduce your editing time because you won’t need to fix as much as if you shot in auto mode.

3. Think before you take a photo
A lot of Etsy sellers and makers rush through the process of photographing their products and I get it. It’s a time-consuming item on your to-do list.
However, when you rush through things, you often don’t get the results you what and you end up making mistakes that you could have avoided.
Your product photos are the 2nd most important asset of your craft business right after your product. This means you shouldn’t just try and rush through this process.
It means you should slow down and think before you take a photo because these are the photos that will help you grow your sales and your business online.
By thinking through what you’re doing, you’ll increase your chances of creating quality photos of your handmade products that will attract customers and elevate your sales.
Look to see if there are ways you can improve your lighting, your backgrounds, props, and so on.
Just slowing down and thinking about what you’re doing, you’ll majorly improve the way your products look and feel which can make all the difference in your craft business online.
4. Practice and experiment with taking product photos
I know that taking product photos takes time, but let me tell you that it’s so worth it.
By dedicating time to practice and experiment with product photography, you’ll drastically improve your results.
You’ll get so much clarity in understanding what will make your products look their best that you’ll know exactly how to take great photos of your work.
The next thing you know, you’ll be getting professional-looking photos of your handmade products in half the time you used to, driving more traffic to your shop and making more sales online.

Final Thoughts
As an Etsy seller, I settled for product photos I wasn't happy with. As a result, it negatively impacted my sales and my motivation to build and grow my craft business.
But my experience doesn't have to be yours.
That's why I don't want you to give up your dream of selling your handmade products online. Don't let the product photography hold you back from putting your work out there.
If I can DIY great product photos, you can 100% do it too.
Your handmade products deserve to look their best in photos, so try out these Etsy product photography tips. Practice, experiment and see what happens.
You just may surprise yourself at how your product photos can positively impact the growth of your craft business online.
What's 1 thing you struggle with when photographing your products? Leave a comment below and let me know!